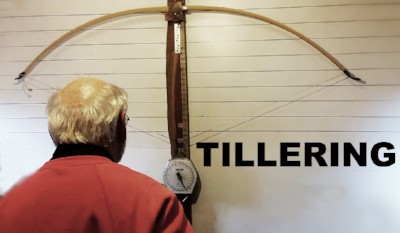
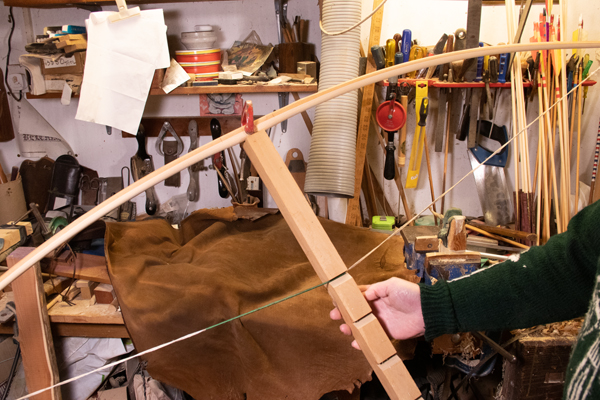
This is the true measure of a Bowmaker, tillering is a process of bending the bow a little bit at a time, slowly looking at the limbs and seeing them evenly develop into the correct shape, a well balanced spring of sorts, ready to propel the arrow. I have often said, as I do in the videos below, tillering is a hard thing to teach, people have different opinions on what a well tillered bow should look like, it can take years to perfect, or indeed develop your own style. Only practice can really `teach` this art, but the basic principles can be shown and hopefully passed on to you.
To start off you are going to need a Tiller (the thing you attach the bow to so you can see the bend), there are a couple of options, depending on the space available to you and how `serious` you want to be about the process, bellow is the most simple, smallest and most affordable way of making a tiller.How to make a `Tillering stick`
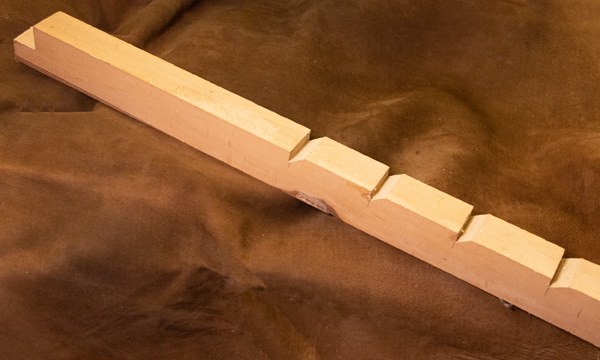
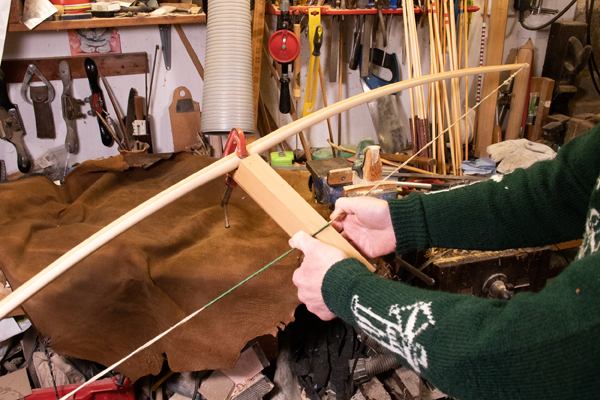
This simple tools will help you support the bow/stave in the center/handle section and allow you, using the notches cut into it, to place the string at increasing distances down the tiller stick, this increases tension of the stave to slowly see the bend of the bow.
Find yourself a sturdy length of timber, cut to 32" long x 1 1/2" wide x 2" deep, these measurements are not critical, cut a 1" notch in the end to accommodate the bow, then cut some notches across the top face of the stick about 1/2" deep to hold the string, start at about 11" down and then at 3" intervals cut more notches.
Here is a video showing the process seen above.
If you are feeling brave, have a bit more room or fancy doing things `like the pros`! then have a look at this video we made on making your own tiller attached to the wall, using ropes and pulleys...
Before we can start Tillering, you will need to prepare the ends of the stave to accept your string, this involves making some grooves with a round file/rasp, check out this video of how to make these grooves before moving on...
So, we have all our kit together, we are ready to start tillering, tillering is changing the will of a piece of wood, once in a tree, to do the bidding of man, making it bend evenly and true, bit by bit, the creation of its stored power, the very job of the Longbow to shoot an arrow is all born out of this stage, get this right and the rest is easy. Again, go slowly with this stage, you can do a lot of the wood removal with a rasp and scraper. We have returned to this part of bow making many times in our videos, for good reason, have a look and take it all in.
Tillering is not something you are ever going to fully get the hang of, I am still learning new things with each bow I make and I have made thousands, each piece of wood is different, each type of bow you make will require different measurements as you try to achieve a particular weight you want or length of bow to suit the archer. We have a few more videos for you to see, each one deals with tillering process depending on the materials used and the type of bow the customer wants or maybe just the construction/layering of wood used, take a look, maybe one of them will suit the type of bow you are making.
Something you may find problematic is dealing with knots, these are the areas of wood left over form side branches, there are many ways to deal with them, from completely ignoring them, removing the area and replacing with a `clean` bit of wood or leaving extra material around the knot to stop it from cracking and reducing bend/stress in that area, here is a video explaining the later method.
It would be churlish of me to say "that's it, onto the next stage, you now understand Tillering", no, as I mentioned above, Tillering is the `art` of bow making, its generally a slow process, you have to practice it, but unfortunately its a process sandwiched between hours of cutting out materials before you can even start to learn and before you know it you are ready to fir the nocks! Cast your mind back to when you learned to drive a car, you didn't have to build the car each time before you got in it for your hours lesson, there is no real way of JUST practicing Tillering, you will learn a little bit more each time you make a bow. This is why you will often see people making and selling bows that `look` like a bow, but, the Tillering isn't as good as the finish or polish on the nocks. Because each bow you will make is different, each type of wood will offer up different hurdles for you to get over, it can take a long time to get the experience and knowledge to be able to look at a lump of wood and see the bow within it. Our hands can soon learn the dexterity to fashion the shape that is required of the aesthetics of a bow, some of you may already be `workers of the wood`, but just because you can play the violin to a performance standard, doesn't mean you play the piano to the same standard without years of practice.
None of this is meant to put you off, I am not trying to make Tillering out to be some unattainable `dark art` achievable only by a few who pay their dues to the `Bowyer Gods`! It is simply that over the years I see many people come to bow making and they view Tillering as just a step in the process, to use my analogy of the car again, imagine if you had to know how a gearbox worked before you could select 2nd, most of us would probably never pass our test!
A nice piece of wood is not going to make the arrow fly fast, a beautiful arrow plate or well varnished limbs wont make for a sweet performing bow, but a Longbow that doesn't necessarily win any prizes for its looks, yet, is well tillered, will always do the job of being a bow, not just a fancy stick.
